Week 1
Humanities
Reflection:
This week, we went in depth on our light photography project. In this project we will be learning about photography and how build our knowledge on it. For the first week, we went out to take photos, looking for cool ways to use light, as well as contrast.
For our first assignment, we went more into one historical photo of Elizabeth Eckford, the first African American to go to an all white school, walk into the doors. After analyzing the photo, we wrote a 200- page "essay" with the lens of someone of our choosing. We were able to choose a historical, social, or personal outlook on the photo, and write about it. Click the link to read:
Chemistry
Reflection:
For the first week, we learned about lab safety considerations, as well as pseudoscience. We talked about myths in science as well, but especially safety.
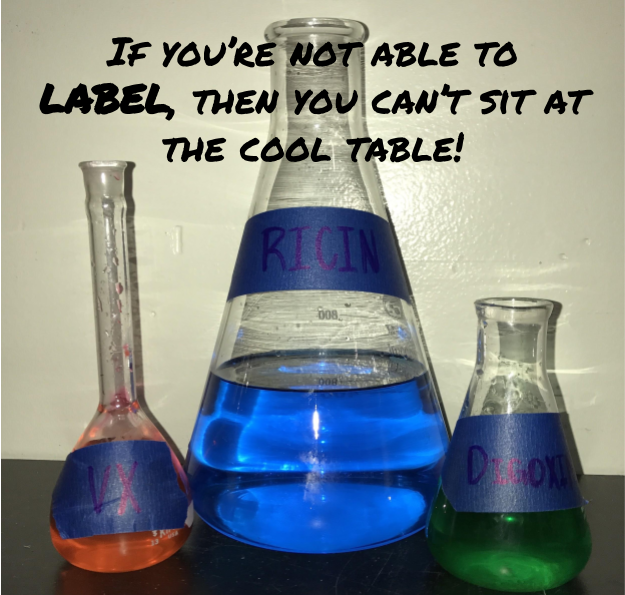
For our first assignment, we made lab safety posters, but integrated photography into it by taking a photo example of our task. My groups task was to always label chemicals correctly:
For the first week, we learned about lab safety considerations, as well as pseudoscience. We talked about myths in science as well, but especially safety.
For our first assignment, we made lab safety posters, but integrated photography into it by taking a photo example of our task. My groups task was to always label chemicals correctly:
Week 2
Humanities
Reflection:
First off, we did a weekly photo review. Then we moved onto the Great Depression era. Each group went in-depth on the outcomes of the depression; my group choosing the New Deal. Our class also read an article, The Harvest Gypsy , written by John Steinbeck; later having a socratic seminar. We finalized the week with a review on an article regarding our presidents future plans with immigrants.
Our second assignment was to answer the question, Does our society really depend on “creating and maintaining a peon class” - Steinbeck; Paragraph 21. Click the link to see my take on this question:
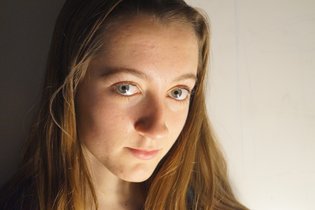
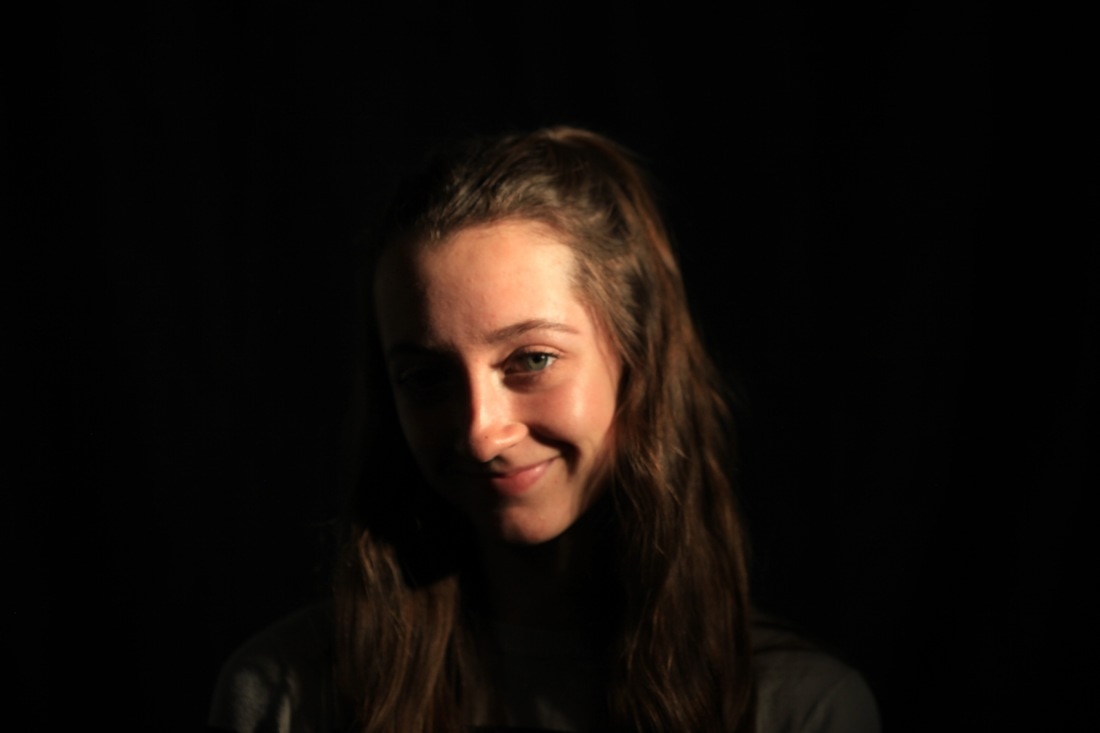
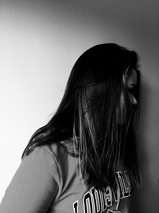
In the middle of the week, we experimented with different lighting. We used ourselves as the photo subject:
|
|
|
For our next mini assignment, we looked over the Statue of Liberty's plaque poem. Then designed a t-shirt according to the poem: We decided to put the earth on the front and back, with quotes from the poem circling the back earth.

Chemistry
Reflection:
This week for chemistry, we started with a lighting lesson. In this lesson we learned different techniques, and how to use lighting in portrait photos. After that lesson, we set up a professional lighting space, and took portrait photos. We ended off the week with a chemistry equation below:
What do the following two equations teach you about Chemistry?
1. AgNO3 + NaCL = NaNO3 + AgCL
2. AB + CD = CB + AD
A= Ag= Silver
B= NO3= Nitrate
C=Na= Sodium
D=CL= Chlorine
I think the first equation is a mix of elements; and when you add them up, they equal something mixed/greater.
Week 3
Chemistry
Reflection:
This week, we started creating our dark room to develop our photography. We started by splitting off into groups, my group being the chemistry group. My group started measuring silver nitrate into small bottles. The other groups started making safe lights. Half of the week was contributed to making the dark room, and the other half our emulsions. Emulsions are what we will be coating our papers with to be able to print our photos. We first started out the process with making apparatuses, which hold all of the beakers, water, ect.
Dark Room:
Basically what a dark room is a dimly lit room with safe lights, that allows you to delicately develop photography. Our first task with the room is figuring how to make it as dark as possible; first with the window/door. The entrance group decided to cover the window on the door with tinfoil, which eliminated light from the window. Now, the are looking at how to make a safe entrance into the room. When opening and closing doors, we can't have any light or all of our photos will be ruined. One group made the safe lights which are LED lights with brown paper bags over them, which creates a dim light, that is safe for developing! Other groups cleaned the room as well; and my group was the chemistry team. We spent two days measuring out chemicals like silver nitrate, gelatin, and sodium chloride. These chemicals will later be mixed in our apparatuses to create our emulsions. Lastly we had to make our apparatuses; which are devices to make emulsions. These consist of hot plates, something to hold water, a ring holder, and clamps. Along with beakers, this is basically a double broiler. Once we added our thermometers, we were finished making the apparatuses.
Humanities:
Reflection:
For week 3 of humanities, we started our first benchmark. This benchmark was to choose one Dorothea Lange photo and write 5, 150-250 word perspectives on the photo. Once we have all of these critiqued, it should be around 1000 words, and we will frame the photo of our choosing with our perspectives. We also started the book Of Mice and Men by John Steinbeck. Earlier in the week, we read one of his speeches during his nobel prize ceremony. This was for us to start noticing his writing, and after reading chapter one we unpacked it!
Click on link below for my Dorothea Lange perspective:
Of Mice and Men:
After reading only the first paragraph of this book, we unpacked it and found so much. We looked at how Steinbeck uses a lot of biblical terms, even though he wasn't a religious man, he refers to the sycamore tree. He also refers to the beginning of time, with nature, then animals, then man. Over the next chapter, the two main characters were introduced, and now we know a little bit more about the storyline. So far, this book is incredibly interesting and has left me wanting to read more.
After reading only the first paragraph of this book, we unpacked it and found so much. We looked at how Steinbeck uses a lot of biblical terms, even though he wasn't a religious man, he refers to the sycamore tree. He also refers to the beginning of time, with nature, then animals, then man. Over the next chapter, the two main characters were introduced, and now we know a little bit more about the storyline. So far, this book is incredibly interesting and has left me wanting to read more.
Week 4
Chemistry
Reflection:
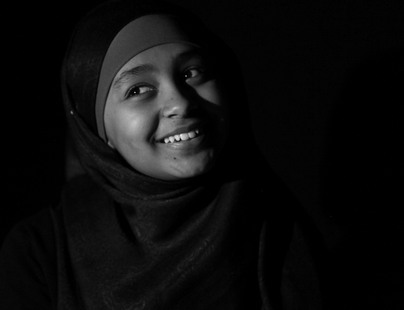
We started this week by creating our emulsions. These are used to coat papers, to be able to develop our photos. Using our apparatuses, we mixed all of the chemicals that we made in the past week, and melted them together. Then, put them in an amber bottle to preserve. Then we painted our photo paper with our emulsions. On Wednesday, we had a photoshop workshop, which showed us how to contrast our photos. After that, we put a portrait into photoshop which will be below. The rest of the week was work time in both classes.
We started this week by creating our emulsions. These are used to coat papers, to be able to develop our photos. Using our apparatuses, we mixed all of the chemicals that we made in the past week, and melted them together. Then, put them in an amber bottle to preserve. Then we painted our photo paper with our emulsions. On Wednesday, we had a photoshop workshop, which showed us how to contrast our photos. After that, we put a portrait into photoshop which will be below. The rest of the week was work time in both classes.
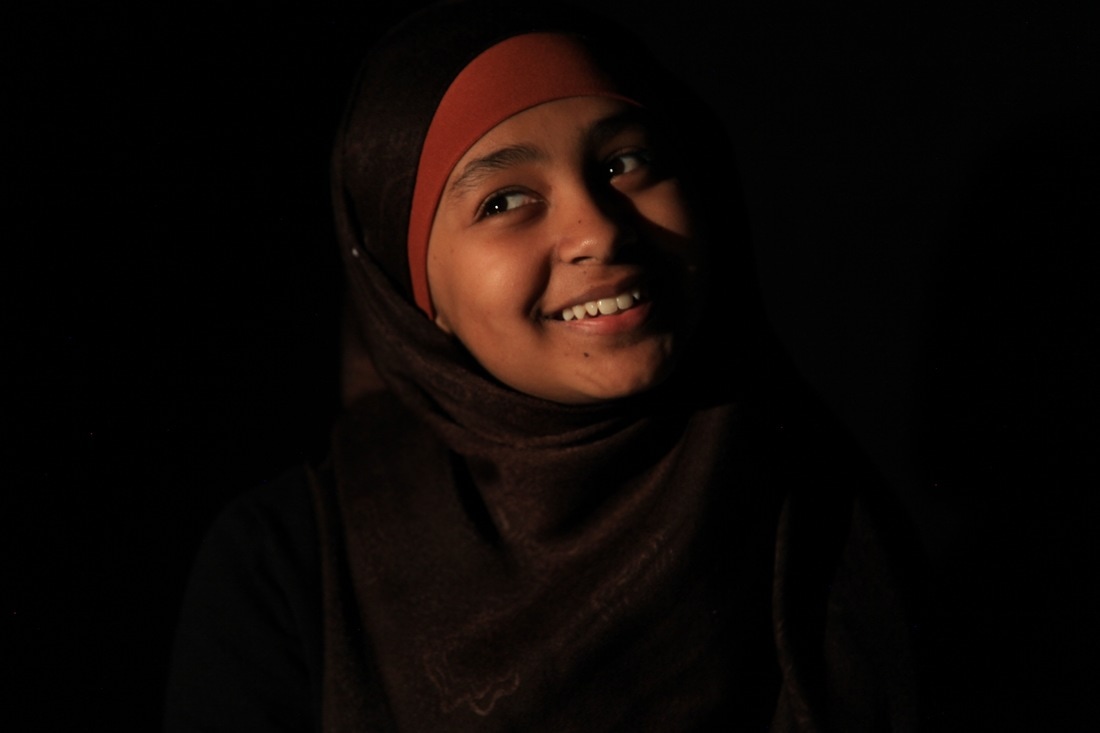
The first image is the original photo. The image on your right is the photoshopped version. What I first did was put it in black & white, and then changed the brightness and contrast. After that, I played with the coloring, making the background colors lighter or darker.
|
|
Humanities
Reflection:
We started off the week by getting time to work on our Benchmarks. Our second benchmark is to also take a photo of humanity, and write 5 paragraphs on it, just like the first one. This week we had time to start planning it in advance, so we knew exactly what we wanted to shoot. On Tuesday, we read the next chapter Of Mice and Men. Over the next few days we unpacked certain aspects of the book. This week, we were introduced to a lot of new characters in our book. On Wednesday, we had a socratic seminar on the book. The rest of the week was work time.
We started off the week by getting time to work on our Benchmarks. Our second benchmark is to also take a photo of humanity, and write 5 paragraphs on it, just like the first one. This week we had time to start planning it in advance, so we knew exactly what we wanted to shoot. On Tuesday, we read the next chapter Of Mice and Men. Over the next few days we unpacked certain aspects of the book. This week, we were introduced to a lot of new characters in our book. On Wednesday, we had a socratic seminar on the book. The rest of the week was work time.
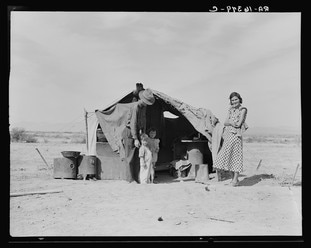
The photo above was taken by Dorothea Lange, and was the photo I chose to write my perspectives on:
Humanity Photo Plan:
What we have to do for benchmark #2 is capture a photo showing the struggle of humanity. Since I will not be there for the week, I'm taking my camera and will capture some type of human struggle. I was thinking, since it will be cold, perhaps someone on the street, or just any person that catches my eye. After that, I will begin on my 1000 word perspectives, just like benchmark #1.
When: Over the week of the 13th - 16th
Where: New Mexico
Who: Someone who I can have empathy for and is possibly going through a struggle
Why: Because the assignment also wants us to capture ourselves/humanity in a way through photography
Week 5
Chemistry
Reflection:
For all of week 5, I was on vacation, however I still completed work. In chemistry, watched 1 hour of PBS, Hunting the Elements. After, I wrote a 200 word excerpt on what I learned. This video included the periodic table, explosions, and reactions. The link below will take you to my writing:
For all of week 5, I was on vacation, however I still completed work. In chemistry, watched 1 hour of PBS, Hunting the Elements. After, I wrote a 200 word excerpt on what I learned. This video included the periodic table, explosions, and reactions. The link below will take you to my writing:
Humanities
My biggest task for this week was taking my photo of humanity. I decided to take it while I was on vacation, especially because my destination felt like the perfect place. I chose to capture my photo on our family friends, seen below, and wrote. I also completed my first draft of my 1000 piece writing.
Week 6
Reflection:
This week in chemistry we started developing photos (read below for more information). In humanities we had work time for our 1000 word essays. This week we started talking about the landscape phase of our project.
This week in chemistry we started developing photos (read below for more information). In humanities we had work time for our 1000 word essays. This week we started talking about the landscape phase of our project.
Chemistry
This week in chemistry, we actually started developing photos! However, first we took our photos and edited them on photoshop. After you're done with your black and white photo design, you invert it to get the negatives. You need the negative of whatever you are developing, so you invert it. Next, you use the emulsion coated papers and put the negative over it (all in the dark room), and hold a UV light so the non developed parts transfer onto the paper. After, you soak in the photo developer you pull directly into the stop bath. Then you're photo is there!
You also may be wondering about the science and chemicals behind photo developing. So one other thing we did this week was learn about that. What actually happens when you put your paper into the developer water is that it adds an electron back into the freed silver ions, making it turn dark when it hits the chemicals. Directly after your photo is done, you put it into the stop bath. This stops the developer by taking away any of the leftover electrons. Next is the fixer, which dissolves the remaining silver chloride salts. Finally, there is the wash, which washes away any residual chemicals. The reason why the silver chloride makes a photo onto papers is because AgCL (silver nitrate) is light sensitive. So when the UV light hits it, it exposes it in all the light places from the negative.
Questions:
1. How long do you expose the photo for glass?
2. How long at the least amount of time does it take for your paper to fully dry?
Humanities
For this week we had work time on everything. We got to work on our 1000 word essays, plus anything we had to finish. Something else we did was talk about our next phase of the project, landscape photography. Below is my 1000 word draft:
One of my possible plans for a landscape shot is to go somewhere in the mountains. Some of my ideas include:
-Mt. Laguna
-Julian
-Desert
-Mt. Laguna
-Julian
-Desert
Week 7
Chemistry
Reflection:
We started off week 7 by doing an experiment in chemistry regarding hydrogen and making balloons explode. After, we debriefed about our experiment, we had work time. The next few days were spent developing photos; and finishing up phase 1 of our project. In humanities we had a socratic seminar.
We started off week 7 by doing an experiment in chemistry regarding hydrogen and making balloons explode. After, we debriefed about our experiment, we had work time. The next few days were spent developing photos; and finishing up phase 1 of our project. In humanities we had a socratic seminar.
For our H2 balloons we started by mixing citric acid with magnesium ribbons in a volumetric flask. When we noticed the magnesium was dissolving, the flask started getting hot; so we put the water balloon over the top of the flask. Then the balloon started to blow up, which made our H2 balloons. Once we finished with that, we taped our balloons to a stick and held them over a small flame. Within a few seconds, the whole balloon blew up, creating a small explosion.
Questions We Had:
1. Why the flask was warm?
2. Why did everything blow up?
3. What in the chemicals made it blow up?
What I really took out of this process how the number of protons, neutrons, and electrons really matter. The number of electrons for different parts of the periodic table vary, so when mixing different chemicals, you get different reactions.
Humanities
We started off this week in humanities with socratic seminars. The question, Are americans responsible for creating their own American Dream was introduced to us, it got us thinking. Half of the class participated in this, me not being one of them, and discussed the question at hand. The next day, we were introduced a new question, Wealthy people have a responsibility to help poorer people, yes or no, and we had a seminar on that question. We also read another article from John Steinbeck, Harvest Gypsies 2. We talked about that article after, and for the last few days we talked about different writing styles. One other point made to us was to learn more about the Hetch Hetchy Dam in Yosemite (below):
We also started talking about water decisions and the landscape impact:
Week 8
Reflection:
We started planning for our independent projects this week in chemistry. In humanities we started looking at landscapes and did a short excerpt on one of the examples of our choosing.
We started planning for our independent projects this week in chemistry. In humanities we started looking at landscapes and did a short excerpt on one of the examples of our choosing.
Chemistry
This week we planned for our independent project, making a proposal to be checked off by Andrew. Half of the week was contributed to that, and the other week was for finishing developing our photos. One thing I've been working on in the dark room is coating, printing, and developing screens to be able to screen print.
The link above is linked to my project proposal. What my group members and I want to do is add chemistry into baking, just like using yeast, baking powder/soda, ect. What we want to know is what will happen if we double the amount of yeast in a recipe, something like donuts. We also wanted to tests recipe that no one in my group has made. We're thinking that maybe we could make monster donuts by adding more yeast! What we hope to learn is what will happen when the amount of yeast is doubled, and we are trying to accomplish the act of making something very big.
Humanities
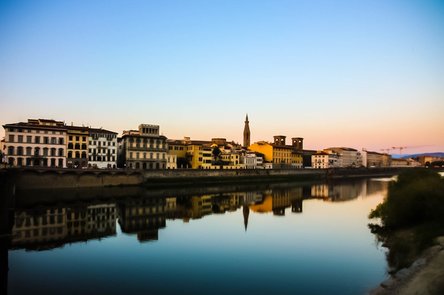
This week we looked a number of landscape panoramas because we're moving into phase 2. In this phase we will be focusing on landscape, starting off with panoramas. After looking at all of the landscape panoramas we chose one to write about, describing the elements. Click the link below to see what I wrote about the Arches Pano:
Week 9
Reflection:
This week we took some landscape photos and learned how to process them. In chemistry we also learned that different periodic table elements make different color flames. In humanities we started to write in John Steinbeck's writing style.
This week we took some landscape photos and learned how to process them. In chemistry we also learned that different periodic table elements make different color flames. In humanities we started to write in John Steinbeck's writing style.
Chemistry
This week in chemistry we joined up with humanities and went to take photos. We took landscape photos, as that is the next phase of the project. Then we processed our photos in photoshop. On a different day, we burned up different elements from the periodic table, and looked for the colors of the flame. The rest of the week was contributed to working further on our project as a whole; Light.
The light experiment lab was mixing elements with fire. The elements we mixed were:
1. Sodium
2. Boron
3. Potassium
4. Copper
5. Strontium
6. Lithium
7. Magnesium
8. Iron
When lighting these on fire, we looked at the color of the flame. Knowing the different colors of the flames tell us the type of element if you don't know. What the real question we were asking was; What is light?
After watching a video on light, this came up:
"Different atoms emit different colors of light, if we can measure that light, in principle we can determine what an object is made of, even if we can't touch it"
Mini Project:
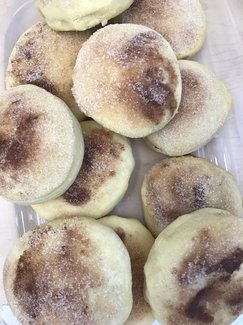
For our first mini project, we wanted to incorporate baking into chemistry, because we're really into that! We also wanted to know what is actually happening when we use yeast in our baked goods. So our first task was to figure out what we wanted to make; it had to be something we never made before, so we decided to go in the donut zone. After finding a recipe for baked, jelly filled donuts, we doubled the yeast amount. By doing this, we were hoping to make MONSTER DONUTS! We learned that when mixing yeast with some type of sugar, the yeast literally fart out air bubbles, making your dough light and fluffy with air.
Our end product did not come out the way we hoped however. They were a dense roll dough, instead of a fluffy light dough. This was because of the amount of yeast that we put in, and after the baking process they were very dense donuts! All in all, we learned that more yeast doesn't make bigger donuts, but it was still a fun project to try!
Humanities
This week we took a passage from Steinbeck's, Of Mice and Men, and wrote an excerpt like the first passage of the book. The prompt was: Think of a place that always has an effect on you. Tell us about it.
Below is my Steinbeck writing:
Below is my Steinbeck writing:
Week 10
Chemistry
Reflection:
This week in Chemistry, we broke off into groups to help move our project along. My group is the silk screen printing group; so what we're doing is finding different materials we can potentially print our photographs on, and then testing on those backgrounds. The rest of the week was working on those jobs, and the last two days were filled with work time and field trips. On Thursday we biked to Sunset Cliffs to take photos!
This week in Chemistry, we broke off into groups to help move our project along. My group is the silk screen printing group; so what we're doing is finding different materials we can potentially print our photographs on, and then testing on those backgrounds. The rest of the week was working on those jobs, and the last two days were filled with work time and field trips. On Thursday we biked to Sunset Cliffs to take photos!
Silk Screen Printing Group:
What my group accomplished this week was testing on metallic glossy photo paper. Although this sounds quite simple, it's not. We had to find the ICC profile to match the colors of the ink to the colors of a computer screen. This is basically printing a series of colors on the paper, followed up by making the slightest changes in the print settings until we got a match of colors. Since the next two weeks are Spring Break, during the following weeks of school we will be test printing more!
What my group accomplished this week was testing on metallic glossy photo paper. Although this sounds quite simple, it's not. We had to find the ICC profile to match the colors of the ink to the colors of a computer screen. This is basically printing a series of colors on the paper, followed up by making the slightest changes in the print settings until we got a match of colors. Since the next two weeks are Spring Break, during the following weeks of school we will be test printing more!
Humanities
At the end of this week in humanities we filled out a google document talking about contrast in John Steinbeck's, Of Mice and Men book.
Contrast in Of Mice and Men
Valley side Water
Crunchy Leaves
Soft Sand
Quiet Bank
Beaten Path
Living tree (Life)
Fire/Ashes (death)
2. Where does Steinbeck specifically use DICHOTOMY in this section?
Steinbeck uses dichotomy when he is talking about the sycamore tree and the pile of ashes. Using two very different things in one sentence gives a contrasting feel. Maybe he was even trying to talk about life vs. death; a sycamore tree vs. pile of ashes.
Text:
A few miles south of Soledad, the Salinas River drops in close to the hillside bank and runs deep and green. The water is warm too, for it has slipped twinkling over the yellow sands in the sunlight before reaching the narrow pool. On one side of the river the golden foothill slopes curve up to the strong and rocky Gabilan Mountains, but on the valley side the water is lined with trees- willows fresh and green with every spring, carrying in their lower leaf junctures the debris of the winter's flooding; and sycamores with mottled, white, recumbent limbs and branches that arch over the pool. On the sandy bank under the trees the leaves lie deep and so crisp that a lizard makes a great skittering if he runs among them. Rabbits come out of the brush to sit on the sand in the evening, and the damp flats are covered with the night tracks of 'coons, and with the spread pads of dogs from the ranches, and with the split-wedge tracks of deer that come to drink in the dark.
There is a path through the willows and among the sycamores, a path beaten hard by boys coming down from the ranches to swim in the deep pool, and beaten hard by tramps who come wearily down from the highway in the evening to jungle-up near water. In front of the low horizontal limb of a giant sycamore there is an ash pile made by many fires; the limb is worn smooth by men who have sat on it.
- Annotate the selection below for elements of CONTRAST
- Where do we find contrast in the introduction to Of Mice and Men?
Valley side Water
Crunchy Leaves
Soft Sand
Quiet Bank
Beaten Path
Living tree (Life)
Fire/Ashes (death)
- Where does Steinbeck specifically JUXTAPOSE imagery in this section?
2. Where does Steinbeck specifically use DICHOTOMY in this section?
Steinbeck uses dichotomy when he is talking about the sycamore tree and the pile of ashes. Using two very different things in one sentence gives a contrasting feel. Maybe he was even trying to talk about life vs. death; a sycamore tree vs. pile of ashes.
Text:
A few miles south of Soledad, the Salinas River drops in close to the hillside bank and runs deep and green. The water is warm too, for it has slipped twinkling over the yellow sands in the sunlight before reaching the narrow pool. On one side of the river the golden foothill slopes curve up to the strong and rocky Gabilan Mountains, but on the valley side the water is lined with trees- willows fresh and green with every spring, carrying in their lower leaf junctures the debris of the winter's flooding; and sycamores with mottled, white, recumbent limbs and branches that arch over the pool. On the sandy bank under the trees the leaves lie deep and so crisp that a lizard makes a great skittering if he runs among them. Rabbits come out of the brush to sit on the sand in the evening, and the damp flats are covered with the night tracks of 'coons, and with the spread pads of dogs from the ranches, and with the split-wedge tracks of deer that come to drink in the dark.
There is a path through the willows and among the sycamores, a path beaten hard by boys coming down from the ranches to swim in the deep pool, and beaten hard by tramps who come wearily down from the highway in the evening to jungle-up near water. In front of the low horizontal limb of a giant sycamore there is an ash pile made by many fires; the limb is worn smooth by men who have sat on it.
Week 11
Chemistry
Reflection:
This week both classes were devoted to our project jobs. Mine being the emulsion crew, my groups job was to print out at least 6 of our landscapes on our metallic paper. After, we were able to mount our photos and put epoxy over them to seal them. The reason why we had to get at least 6 by Friday, is because the Liberty Public Market has a spot on the wall for 6 of our landscape photos! Over the next few weeks, we will continue to make and hang our new artwork.
This week both classes were devoted to our project jobs. Mine being the emulsion crew, my groups job was to print out at least 6 of our landscapes on our metallic paper. After, we were able to mount our photos and put epoxy over them to seal them. The reason why we had to get at least 6 by Friday, is because the Liberty Public Market has a spot on the wall for 6 of our landscape photos! Over the next few weeks, we will continue to make and hang our new artwork.
This week we were asked to answer the following questions:
1. What is the relationship with LIGHT?
2. How does each step of the process involve and/or change LIGHT?
3. Why is it important to frame and exhibit work?
1. Everything has to do with the relationship of light in this project; every step revolves around light. All of the materials that we chose, we chose for a reason; whether thats the paper, the epoxy, or even the ink. For example, we use metallic photo paper because when light hits it, it gives a specific look.
2. Each step of the process involves light by how it is affected by light. Everything was chosen to reflect light or have a specific outcome from light. When we process our photos, we're playing with light. Since there is a histogram on everyones photo when being processed, by moving that histogram up or down, the lighting changes. If you're brightening your photo, the lighting gets brighter. This is how each step is involved with lighting.
3. It is important to frame and exhibit our work because it's a way to bring people together, and showcase your work. When others are informed of what is going on in your school life, they become interested. This might mean that they come to more exhibitions or even buy your work. Exhibiting our work also helps with our work production. When someone gives your praise for your hard work, it makes you want to do more good work. In this sense, praise and hard work are completely correlated!
Humanities
1. What role does each step play?
2. What is the relationship with LIGHT?
1. Each step has a different role to play with this whole project; and each individual material plays a different role. Starting with materials, you have to print your photo on something. What we use is metallic photo paper, which in the light, gives a reflective look. When adding epoxy to the top layer this adds another reflective layer. As light hits the two combined surfaces, it reflects, giving a metallic look to parts of the photo. We mount our photos on a piece of wood board, because it gives a stable back to the photo, and makes it easier to pour epoxy on. When printing your photo, it’s important to use the right ink, that will give the best coloring on the paper. Different ink works differently on types of papers, so for our paper, we’re using the nicest ink we can find to get the best color pay off.
2. The relationship with light comes from your medium. When using metallic photo paper with glossy epoxy coating, light is very different with these mediums comparing to regular photo paper. For example, when light hits a regular photo paper print, it’s glossy, but with metallic paper, it gives a sheen to the eye. This will make whites appear brighter, and an overall shiny look. So, the relationship with light comparing to using regular paper is huge. It gives a very different look and plays with light in a completely new way.
Week 12
Reflection:
This week we started off in Humanities by starting a new book. The book Light is a story on light and its origins, and basically what light is. In chemistry we started talking about epoxy and what it is. For a brief definition, it is a mix of hardener and polymer that creates a hard glass like surface. We ended off the week with a small experiment making slime.
This week we started off in Humanities by starting a new book. The book Light is a story on light and its origins, and basically what light is. In chemistry we started talking about epoxy and what it is. For a brief definition, it is a mix of hardener and polymer that creates a hard glass like surface. We ended off the week with a small experiment making slime.
Humanities
In humanities this week we started a new book, Light by Bruce Watson. So far this book is about how everyone views light differently, but also how famous scientists, artists, and philosophers helped find out what light was. After reading the opening passage we did small passages of research on the people that came up in the opening reading. Later, we were asked to write a 350 word essay on the prompt: How does the work of scientists, artists, and philosophers lead to wonder and curiosity? (My work below)
Chemistry
During chemistry this week we learned about epoxy and polymer bonds and how they are made. Then we did an experiment with glue and boric acid, and made it into slime. Over the week we had to do a writing piece about what we learned when making slime (below). At the end of the week we watched an episode of Cosmos: On light.
Cosmos Light Right Up:
Chemistry of Epoxy/Polymerization:
Below is my final landscape image:
Week 13
This week was all about reading and research. We started off the week by reading more of our book Light. After, we started researching what astro photography shot we are planning on taking. My group is try to go for Crescent Nebula and all of our findings are down below.
Humanities
In humanities this week, we read chapter 2 of our book, Light. Next week we should be having our socratic seminar on how the book is going so far.
Chemistry
We started off week 13 with work time. Since next week is our camping trip, we've been put into our groups for photographing. We made a "Hit List" for what stars/nebulas/landscapes we're planning on shooting May 1st and 2nd. My group has had to pinpoint what time our nebula will be up in the sky, so we don't have to plan later. Most of the week has been this type of work time, along with the continuous reading of our book in humanities.
Since my group is the Nebula group, we want to shoot nebulas! Our main nebula that we’re going for is the Crescent Nebula. On the second night we plan between 1-3 a.m. to get that nebula. Some other options are North America, Trifid, and Lagoon nebula. On our off night, we plan to do some landscape photos, as well as shooting the Milky Way.
Nebula: A gas cloud in outer space; place where stars are born.
Crescent Nebula:
Other Name: NGC6888
Magnitude: 7.4
Size: 18 x 12
Nebula: A gas cloud in outer space; place where stars are born.
Crescent Nebula:
Other Name: NGC6888
Magnitude: 7.4
Size: 18 x 12
Week 14
Reflection:
This week we went camping! We went to Lake Cuyamaca to take astro photography photos!
This week we went camping! We went to Lake Cuyamaca to take astro photography photos!
Humanities/Chemistry
On Monday morning we set out on our camping trip! We arrived back on Wednesday in the late morning and went straight home. My goal for this trip was to capture Crescent Nebula, but to learn more about my discoveries, keep reading. Instead of capturing Crescent, we got Lobster Nebula! My group and I decided to go to bed on Tuesday night and wake up at 2 a.m. Once we woke up, we waited. We had to set the telescope to the Crescent Nebula, but for some reason, it couldn't track it. After about 45 minutes of looking we trashed that idea. Instead, we started hand scanning through the Milky Way to find a new nebula. Within about 5 minutes we found the Lobster Nebula. Then it was photo time, so we focused the camera on the nebula and started shooting! Since we have to stack our photos, we took around 30, and then it was back to bed. The whole process took about 1.5 hours and was an amazing experience.
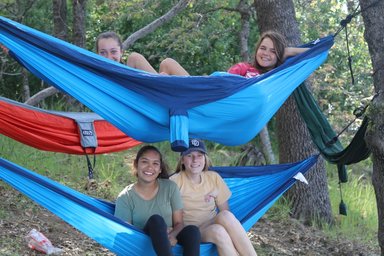
Something that I'll remember 10 years from now about this trip was the hammocks. Everyday we would walk to the other side of Lake Cuyamaca and set up our hammocks. When we got away from the noise, it was so peaceful; we were actually able to sleep. The first day we were out there for around 3 hours, talking, sleeping, and occasionally playing cards. The second day we went in the morning and hung for a while, but in the afternoon went back. We knew we had to beat our record of 3 hours, so we ended up hanging for 4.5 hours! Within that time we took a nap and just hung out. It was so fun and peaceful and I will never forget it. Next time you go camping I would highly recommend bringing a hammock and going for a swing!
Something that I'll remember 10 years from now about this trip was the hammocks. Everyday we would walk to the other side of Lake Cuyamaca and set up our hammocks. When we got away from the noise, it was so peaceful; we were actually able to sleep. The first day we were out there for around 3 hours, talking, sleeping, and occasionally playing cards. The second day we went in the morning and hung for a while, but in the afternoon went back. We knew we had to beat our record of 3 hours, so we ended up hanging for 4.5 hours! Within that time we took a nap and just hung out. It was so fun and peaceful and I will never forget it. Next time you go camping I would highly recommend bringing a hammock and going for a swing!
Week 15
Reflection:
This was our final blog post week before we have our last blog post about Phase #4. This week consisted of finishing up Phase #3, and starting to talk about our final project. This included meetings with our teachers about our future plans, and starting to think about TPOL's.
This was our final blog post week before we have our last blog post about Phase #4. This week consisted of finishing up Phase #3, and starting to talk about our final project. This included meetings with our teachers about our future plans, and starting to think about TPOL's.
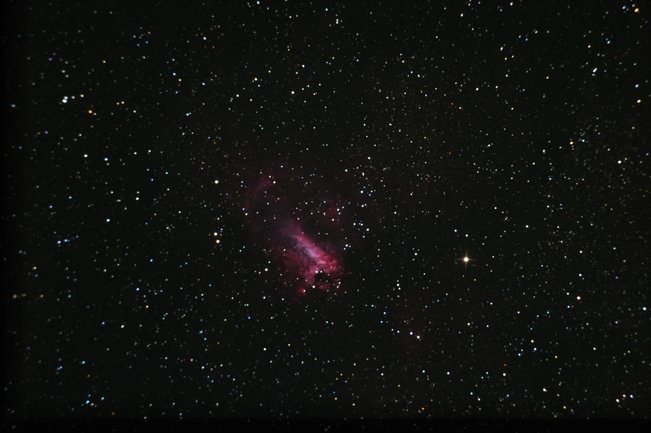
Above is my final processed image from the camping trip! (Lobster Nebula)
Now that we're moving onto Phase #4, we need to have a way to tie it into our TPOL. Above is my plan on what my strengths, areas of growth, and ideas are.
Feedback on TPOL Proposal:
I got some great feedback on my proposal-
-One thing I was asked to do was take practice photos, then practice halftone screen printing on them so when it comes to my final project I am able to do it with no flaws.
-I am also going to be recording my thoughts in a journal entry
Week 16: Final
Reflection of Project:
These past 5 weeks have been full of success but also struggle. Starting out in this project I had no idea where to start. I thought I wanted to do screen printing landscapes but after going out and taking a few photos, I realized that's not what I wanted to do. I was then reintroduced into profile screen printing and went with that.
I had to start somewhere, so I decided to test out a classmates photo. After watching numerous tutorials on how to photoshop half tones in screen printing, it was my turn. My "partner" and I called this the Ed Test, and was our first test at this type of printing. It went off without a hitch and we had done it! Next was finding a photo of my own to print. I decided to do a photo of my sister and I because it's a really meaningful photo. She's going to college next year so it's a pretty bittersweet time in my life right now. So, I chose this photo to represent my sister and I right now.
After i found the photo it was time to start printing. After I made my screen(s), I printed and had fun with it. The screens definitely turned out different than I expected, but turned out still pretty cool. My overall reflection of this final phase of my project was super fun and experimental. The link below is to my google slide that I used for my POL and also the link to my journal entries!
POL- docs.google.com/a/hightechhigh.org/presentation/d/1aCfwkw3egO4yy5lqDXvLzVVPwVWK_XGVsmGlQ1AQ97c/edit?usp=sharing
Writing- docs.google.com/a/hightechhigh.org/document/d/1PoYqGZauy7aKQQYfGtEl3zKLIlBI4hj0aO3MBegYPcQ/edit?usp=sharing
